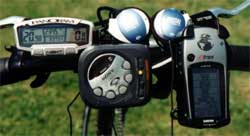
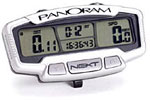
Cycle computer - NEXT Panoram
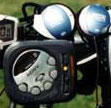
Serves as a backup to the GPS and provides multiple pieces of infomation at a glance. When riding I leave it in the mode that shows current speed, trip odometer, trip time, and clock. The GPS will mainly display altitude, elevation profile, and heading information
This model is sold at major cycling outlets under the Topeak brand name for $50 - $60. I stumbled across it at WalMart.com for $29.98 under the NEXT brand name. The next time I went to our local Wal-Mart I found they had it in stock and picked one right up!
Since the distance from the handlebar to the front fork of this bicycle is much longer than usual, I had to lengthen the cable. This was quite easy and ended up looking very nice. The wire leading to the pickup on the fork is a simple two conductor coaxial wire - I happened to have the extra 12" needed lying in a toolbox at home. A little solder and shrink tubing did the job just fine.
|
|
I listen to the radio to find out weather information and the news while riding. I have headphones that clip over my ear and usually only listen with the right ear so that I can hear traffic with my left ear. I also have a rear view mirror to keep me aware of approaching vehicles.
|
|
The BOB Trailer I'll be towing hooks onto the bicycle with an ingenious skewer with rollers on the end of them. I had to remove the stock skewer and install this new skewer. The trailer hitch has a notch that slides over the roller on the skewer and attaches with two metal clips.
Most other bicycle trailers attach to the frame of the bicycle which causes undue strain on the metal. This system transfers the weight directly to the hub.
|
|
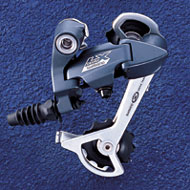
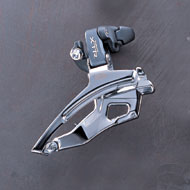
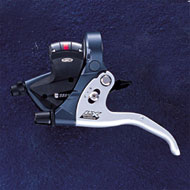
Shimano Derailleurs and Shifters
I replaced the derailleurs on the bicycle in March 2002. The front derailleur did not work properly and the rear derailleur's pulley bearings were shot. They are Shimano Deore LX (rear) and XTR (front) and are a great improvement over the factory equipment
The GripShift shifters weren't very good so I replaced them with Shimano Deore LX trigger shifters that are mounted to the brake levers. They are easier to operate and are built more solidly. I also replaced the brake and derailleur cables; the rear derailleur cable was replaced with a Teflon cable.
|
 |
|
HALT! Dog Repellent Mount
I made a mount for a can of Halt! dog repellent under the seat. This allows me to access the can quickly and keeps it out of sight.
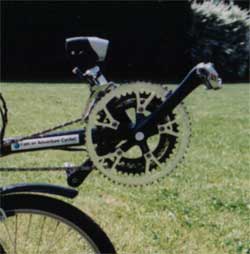
Power Distribution Center
I mounted a plastic box on the top tube just forward of the seat. There are two C cells inside the box and the switches and outlets control the operation of the GPS external power and headlight power. Read more about this here.
|
|
|
Performance Topo SPD pedals
"Clipless" pedals afford greater comfort and ease of operation when riding a bicycle. Recumbent bicycles are particularly easier to ride with clipless pedals since the foot is usually in an upright position. I chose these pedals since they are durable and affordable.
|
|
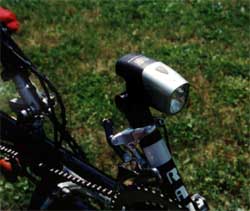
This headlight is a Planet Bike Dual Spot LED/Halogen model that has four operation modes: LED blinking, LED constant, Halogen low, and Halogen high beams. It is mounted to the front derailleur tube with a custom made mount fabricated out of aluminum tubing and sealed with black silicone caulk.
It is powered by the C cells in the power distribution center and controlled with a switch on the distribution center. When the switch is placed in the on position the LED blinking light comes on automatically. The momentary switch on the top of the light changes modes.
|
|
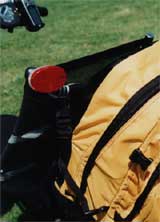
Tail Light & backpack mount
I mounted a Cateye LED tail light to the top left post of the seatback. It is the highest point on the bike and on the side toward traffic. The tail light is powered by two dedicated AAA cells that are inside the light fixture.
You can also see where the backpack mounts to the seat back if you look carefully. There is a quick release buckle sewn onto the side of the backpack with the mating end of the buckle attached to the top seat tube with zip ties.
|
|